
Product Overview
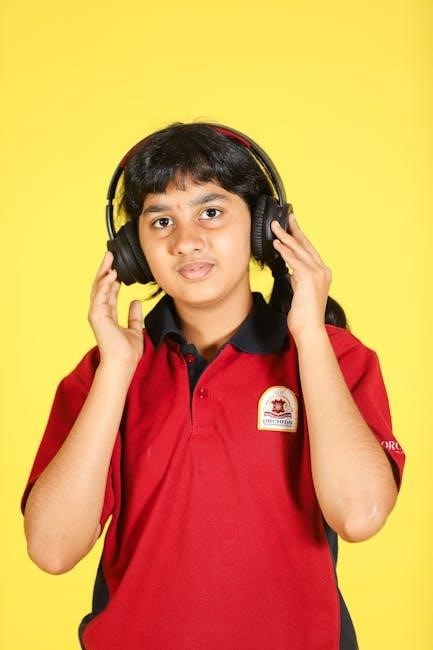
The Logitech H390 Headset offers a comfortable design with adjustable headband and swivel-mounted ear cushions, delivering immersive audio and clear communication with its noise-canceling microphone;
1.1 Key Features of the Logitech H390 Headset
The Logitech H390 Headset offers a USB connection for easy plug-and-play functionality, ensuring quick setup on both Windows and Mac OS X systems. It features a noise-canceling microphone that rotates out of the way when not in use, delivering clear audio for calls and recordings. The headset includes in-line volume and mute controls, providing convenient adjustments during use. Its adjustable headband and swivel-mounted ear cushions ensure a comfortable fit for extended wear. Additionally, the headset is designed with a mute LED indicator and is compatible with various operating systems, making it a versatile choice for both personal and professional settings.
1.2 Benefits of Using the H390 Headset
The Logitech H390 Headset provides clear audio and reliable performance, ideal for video calls and voice recordings. Its noise-canceling microphone ensures crisp communication, reducing background noise. The in-line volume and mute controls offer quick adjustments, minimizing interruptions. The adjustable headband and swivel-mounted ear cushions provide long-lasting comfort, making it suitable for extended use. Its plug-and-play USB connectivity simplifies setup across various devices. Additionally, the rotating microphone boom allows for easy storage and portability. These features make the H390 Headset a practical and efficient choice for both professional and personal use, enhancing productivity and user experience.

System Requirements
The Logitech H390 Headset is compatible with Windows, Mac OS X, and Chromebook. It requires a USB-A port for connectivity and works with standard audio drivers.
2.1 Compatible Operating Systems
The Logitech H390 Headset is designed to work seamlessly with Windows, Mac OS X, and Chromebook operating systems. It connects via USB-A, ensuring compatibility with a wide range of devices. Windows users can enjoy plug-and-play functionality, while Mac OS X users can easily configure the headset through system preferences. Chromebook compatibility is certified, making it a versatile option for diverse computing environments. The headset does not require additional drivers, as it relies on standard audio drivers provided by the operating system. This broad compatibility ensures that users across different platforms can enjoy high-quality audio and clear communication without any setup hassles.
2.2 USB Connectivity Requirements
The Logitech H390 Headset connects via a USB-A port, ensuring easy plug-and-play functionality. It is compatible with standard USB ports found on most computers, laptops, and Chromebooks. No additional drivers are required, as the headset relies on the operating system’s native audio drivers. The USB connection provides digital audio transmission, ensuring high-quality sound and reliable performance. The headset is ready to use immediately after connection, with volume and mute controls conveniently located on the in-line control panel. This simple USB connectivity makes it a hassle-free option for users seeking a straightforward audio solution across various devices.

Installation and Setup
The Logitech H390 Headset features plug-and-play functionality, requiring only a USB-A connection. Windows users can select the headset in sound settings, while Mac users enable it through System Preferences.
3.1 Windows Installation Guide
To install the Logitech H390 Headset on Windows, connect the USB-A connector to your computer. Windows automatically detects the device. Open the sound settings: right-click the speaker icon in the taskbar, select Sound settings, and go to More sound options. Under Playback and Recording, select Logitech USB Headset H390 as the default device. Click OK to save changes. Ensure the headset is not muted and adjust volume using in-line controls. Test audio by playing music or using voice chat to confirm proper functionality.
3.2 Mac OS X Setup Instructions
To set up the Logitech H390 Headset on Mac OS X, connect the USB-A connector to your computer. Open System Preferences and select Sound. Navigate to the Input tab and choose Logitech USB Headset. Repeat this step for the Output tab to ensure both input and output are routed through the headset. Close the window to save settings. Adjust volume using the in-line controls and test audio by playing music or using a voice call app. Ensure the headset is not muted and the microphone is positioned correctly for optimal performance.

Troubleshooting Common Issues
Troubleshoot common issues like the headset not working, poor audio quality, or mute function problems by checking connections, adjusting settings, and ensuring proper driver installation.
4.1 Headset Not Working
If the headset isn’t working, ensure it’s properly connected to your computer’s USB port. Check if the mute button is activated and the mute light isn’t flashing. Restart your computer and verify the headset is selected as the default device in your audio settings. For Windows, go to Sound settings and select Logitech USB Headset H390 as both input and output devices. On Mac, navigate to System Preferences > Sound and choose the headset for input and output. If issues persist, reinstall the latest drivers from the Logitech website or contact support for further assistance.
4.2 Poor Audio Quality
If experiencing poor audio quality, ensure the headset volume is not muted or set too low. Adjust the volume using the in-line controls or system settings. Check that the microphone is positioned correctly, away from clothing and background noise. Restart your computer to reset the audio drivers. If issues persist, ensure the headset is selected as the default audio device in your system settings. For Windows, navigate to Sound settings and confirm Logitech USB Headset H390 is chosen for both input and output. On Mac, go to System Preferences > Sound and select the headset for input and output. Reinstalling drivers may also resolve the issue.
4.3 Mute Function Not Working
If the mute function on your Logitech H390 headset isn’t working, start by checking the mute button for any obstructions or debris. Ensure the mute light is not flashing, as this can indicate a communication issue with your computer. Restart your system to reset the connection. On Windows, go to Sound settings and verify that the Logitech H390 is selected as the default device for both input and output. For Mac users, navigate to System Preferences > Sound and select the headset for both Input and Output. If the issue persists, unplug and replug the USB connector to ensure proper connection. Additionally, visit the Logitech support website to download and install the latest drivers, which may resolve software-related issues. If problems continue, consider reaching out to Logitech Support for further assistance or potential replacement.

Microphone Setup and Optimization
Adjust the microphone boom for optimal voice capture. Position it near your mouth for clear audio. Ensure proper alignment to enhance noise-canceling performance and clarity.
5.1 Adjusting the Microphone Boom
To optimize the microphone performance, adjust the boom arm to position the microphone near your mouth. Gently rotate the boom up or down until it aligns with your voice source. Ensure the microphone is not touching your clothing or accessories to avoid noise interference. For storage or when not in use, fold the boom arm upward. Proper alignment enhances voice clarity and reduces background noise, ensuring crisp audio during calls or recordings. Regularly check the boom’s position to maintain optimal performance.
5.2 Positioning the Microphone for Optimal Performance
Position the microphone boom to align with your mouth for clear audio capture. Ensure the mic is 2-3 inches away from your mouth to avoid muffled sound. Adjust the boom so it points toward your lips, not your chin or nose. Avoid letting the microphone touch your clothing or accessories, as this can cause noise interference. For best results, test the microphone by speaking at a normal volume and adjust its position until your voice sounds clear and natural. Proper placement ensures high-quality audio and effective noise cancellation during calls or recordings.
Customization and Control
Customize your experience with in-line volume and mute controls, allowing easy adjustments during calls. Use Logitech software to tailor settings for enhanced audio and functionality.
6.1 Using In-Line Volume and Mute Controls
The Logitech H390 features convenient in-line controls, allowing you to adjust volume or mute your microphone effortlessly. The volume slider enables precise audio level customization, while the mute button provides quick call management. An LED indicator on the mute button flashes when the microphone is muted, ensuring clear visual feedback. These controls are intuitively designed for easy access, letting you maintain focus during calls or multimedia sessions without unnecessary interruptions. The in-line controls are seamlessly integrated into the headset’s cable, offering a user-friendly experience that enhances productivity and convenience.
6.2 Customizing Settings via Logitech Software
Logitech software allows users to tailor their H390 headset experience. Download and install Logitech G HUB or similar software to access advanced settings. Adjust equalizer preferences, microphone levels, and noise cancellation features for optimal audio performance. Customize the mute button function or create profiles for different applications. The software also enables firmware updates, ensuring your headset stays up-to-date with the latest enhancements. For detailed instructions, visit the Logitech support page and explore the full range of customization options available for your H390 headset.
Maintenance and Storage
Regularly clean the H390 headset with a soft cloth and mild soap. Store it in a protective case, away from direct sunlight and moisture to ensure longevity.
7.1 Cleaning the Headset
To clean your Logitech H390 Headset, gently wipe the ear cushions and headband with a soft, dry cloth. For tougher stains, dampen the cloth with water, but avoid harsh chemicals or excessive moisture. Use a lightly dampened cloth to clean the microphone and other exterior surfaces. Allow all parts to air dry completely before storing or using the headset. Regular cleaning ensures optimal performance and maintains hygiene. Avoid submerging any part of the headset in water or using abrasive cleaners, as this may damage the materials or electronics.
7.2 Proper Storage Techniques
For optimal preservation, store your Logitech H390 Headset in a cool, dry place. Lay it flat or hang it to avoid bending the headband. Use the provided pouch or a protective case to shield the ear cushions from dust. Ensure the microphone boom is securely positioned to prevent damage. Avoid exposing the headset to extreme temperatures or humidity, as this may degrade the materials. Regularly inspect for dust or debris and clean before storing. Proper storage extends the lifespan and maintains the headset’s performance and appearance.

Warranty and Support
Logitech offers a limited warranty for the H390 Headset, covering manufacturing defects. Visit Logitech’s official website for detailed warranty terms and contact support for assistance.
8.1 Understanding the Warranty
The Logitech H390 Headset is backed by a limited warranty that covers manufacturing defects for a specific period from the date of purchase. This warranty ensures that any defective parts or issues arising from improper workmanship will be addressed by Logitech. To claim warranty benefits, users must provide proof of purchase and contact Logitech Support directly. The warranty does not cover damage caused by misuse, accidents, or normal wear and tear. For detailed terms and conditions, visit Logitech’s official website or refer to the product packaging. Understanding the warranty helps users make informed decisions and ensures protection for their investment.
8.2 Contacting Logitech Support
To contact Logitech Support, visit the official Logitech website and navigate to the support section. From there, you can access various resources, including FAQs, troubleshooting guides, and direct contact options. For specific assistance with the H390 Headset, use the search bar to find relevant articles or download the latest drivers and software. Additionally, you can reach out via live chat or submit a support ticket for personalized help. Ensure you have your product serial number ready for faster service. Logitech also provides regional contact numbers for phone support. Reaching out to support ensures quick resolution to any issues with your H390 Headset.
The Logitech H390 Headset is a reliable tool for clear communication. Its comfort, audio quality, and ease of use make it ideal for daily tasks. Proper care and setup ensure optimal performance.
9.1 Final Tips for Optimal Use
For the best experience with your Logitech H390 Headset, ensure proper fit by adjusting the headband and positioning the microphone. Regularly clean the ear cushions and microphone to maintain audio quality. Use the in-line controls for quick volume adjustments and muting. Store the headset in a cool, dry place when not in use to prevent damage. Keep the USB connection secure to avoid signal loss. Check for firmware updates periodically to enhance performance. Refer to the manual for troubleshooting common issues and explore customization options through Logitech software for personalized settings.
9.2 Resources for Further Assistance
For additional support, visit the official Logitech support website, which offers detailed guides, FAQs, and troubleshooting tips. Download the H390 User Manual for comprehensive instructions. Explore the Logitech Community Forum to connect with other users and experts. Contact Logitech Support directly for personalized assistance. These resources ensure you maximize your H390 headset’s performance and resolve any issues efficiently.