
A regenerative radio circuit, like the 1E7G, offers a simple yet effective design for receiving signals, ideal for DIY enthusiasts and vintage radio aficionados seeking nostalgia․
1․1 What is a Regenerative Radio?
A regenerative radio is a type of radio receiver that uses a feedback loop to amplify weak signals, enhancing sensitivity and selectivity․ It employs a single vacuum tube, such as the 1E7G, to serve multiple functions, including detection and amplification․ This design is notable for its simplicity and efficiency, making it popular in early radio technology and among DIY enthusiasts․ The 1E7G, a double pentode tube, is well-suited for regenerative circuits due to its dual sections, allowing for both amplification and feedback control․ This approach enables the reuse of amplified signals to increase sensitivity, although it requires careful tuning to maintain stability․ The availability of detailed schematics, such as the 1E7G regenerative radio circuit PDF, has made it accessible for hobbyists and educational projects, blending historical significance with practical learning opportunities․
1․2 Historical Significance of Regenerative Radios
Regenerative radios hold a pivotal place in the history of wireless communication, emerging as one of the first amplified radio systems․ The 1E7G regenerative radio circuit PDF reflects this legacy, offering a design that echoes early 20th-century innovations․ These radios were instrumental in advancing radio technology, providing a cost-effective and efficient method for signal reception․ The use of vacuum tubes, particularly the 1E7G, allowed for both amplification and detection in a single component, simplifying construction and operation․ This design influenced later radio designs and remains a cherished project among vintage radio enthusiasts and educators, preserving the heritage of early electronics while offering practical learning experiences for modern hobbyists․
1․3 Advantages of Regenerative Radio Circuits
Regenerative radio circuits, such as the 1E7G, offer several advantages, including simplicity, cost-effectiveness, and high sensitivity․ Their minimal component count makes them easy to assemble and repair, appealing to DIY enthusiasts․ The circuit’s ability to amplify weak signals without complex components is a significant benefit, providing reliable performance for shortwave listening and vintage radio applications․ Additionally, regenerative radios are excellent educational tools, allowing hobbyists to explore fundamental radio principles and circuit design․ Their compact size and low power consumption further enhance their practicality, making them a popular choice for both nostalgia-driven projects and modern electronics experiments․
Overview of the 1E7G Tube
The 1E7G is a versatile vacuum tube commonly used in regenerative radio circuits, known for its reliability and suitability for DIY projects and vintage radio enthusiasts․
2․1 Specifications of the 1E7G Vacuum Tube
The 1E7G vacuum tube is a pentagrid converter designed for oscillation and amplification in low-frequency applications․ It operates with a filament voltage of 1․2V and a current of 150mA, making it suitable for portable devices․ The tube features a maximum anode voltage of 100V and is optimized for frequencies up to 5MHz, ideal for shortwave radio applications․ Its unique pentagrid structure enables efficient signal conversion and amplification, crucial for regenerative circuits․ The 1E7G is highly sensitive and stable, offering excellent performance in vintage and DIY radio projects․ Proper handling and biasing are essential to maintain its longevity and operational efficiency․
2․2 Pin Configuration and Connections
The 1E7G vacuum tube features a standard 7-pin configuration, with each pin serving a specific function․ Pin 1 is the filament supply, while Pin 2 connects to the first grid․ Pins 3 and 4 are tied to the second and third grids, respectively․ Pin 5 is the fourth grid, and Pin 6 serves as the fifth grid․ Pin 7 is the anode connection․ Proper wiring is critical for the tube’s operation in regenerative circuits․ The filament requires a 1․2V DC supply, and the grids are connected to tuning circuits and feedback loops․ External capacitors and resistors are often attached to specific pins to optimize performance and stability in the circuit․
2;3 Operating Characteristics of the 1E7G
The 1E7G vacuum tube operates with a filament voltage of 1․2V DC and a current draw of approximately 150mA․ It is designed for high-frequency amplification, making it ideal for regenerative radio circuits․ The tube exhibits a maximum anode voltage of 250V and a grid bias of -1․5V for optimal performance․ Its amplification factor is moderate, ensuring stability in feedback loops․ The 1E7G is particularly suited for shortwave frequencies, with a bandwidth of up to 30MHz․ Proper biasing and cooling are essential to maintain reliability and prevent overheating․ These characteristics make the 1E7G a reliable choice for low-power, high-sensitivity radio applications․

Circuit Components and Schematics
The 1E7G regenerative radio circuit incorporates essential components such as resistors, capacitors, and inductors, carefully selected for optimal signal amplification and feedback control․
3․1 Key Components of the 1E7G Regenerative Circuit
The 1E7G regenerative radio circuit relies on several critical components to achieve its functionality․ The 1E7G vacuum tube serves as the core active component, providing amplification and detection capabilities․ Resistors are used to set voltage levels and bias the tube, while capacitors handle filtering and coupling signals․ Inductors and variable capacitors are essential for tuning the circuit to specific frequencies․ The feedback loop, a hallmark of regenerative designs, is implemented using a combination of resistors and capacitors to control gain and sensitivity․ Proper selection and configuration of these components are vital for optimal performance, ensuring stable operation and precise tuning across the desired frequency range․
3․2 Schematic Diagram of the 1E7G Regenerative Radio
The schematic diagram of the 1E7G regenerative radio provides a detailed visual representation of the circuit’s layout and connections․ It illustrates the 1E7G vacuum tube at the center, with associated resistors, capacitors, and inductors connected in a specific configuration․ The diagram shows the feedback loop, essential for regeneration, and the tuning circuit, which includes a variable capacitor and inductor for frequency adjustment․ Power supply connections, including the heater and high-voltage sections, are clearly marked․ The output is coupled to a speaker or headphones through a capacitor․ The schematic also highlights grounding points and component placements, ensuring clarity for builders․ This diagram is crucial for accurately assembling and troubleshooting the circuit․
3․3 Understanding the Circuit Layout
Understanding the circuit layout of the 1E7G regenerative radio is crucial for effective construction and operation․ The layout is divided into distinct sections, including the vacuum tube stage, tuning circuits, feedback loop, and power supply․ Components are arranged to minimize interference and ensure proper signal flow․ The tube’s pin connections are strategically placed to optimize regeneration and sensitivity․ Grounding points are critical for stability, while the physical placement of capacitors and inductors prevents unwanted coupling․ Proper spacing between high-voltage components ensures safety․ A well-organized layout simplifies troubleshooting and enhances performance․ Builders should follow the schematic closely, adhering to recommended spacing and routing guidelines for optimal results․
Building the 1E7G Regenerative Radio
Building the 1E7G regenerative radio involves carefully assembling components, ensuring proper alignment, and following the circuit layout․ Attention to detail is key for optimal performance․
4․1 Step-by-Step Construction Guide
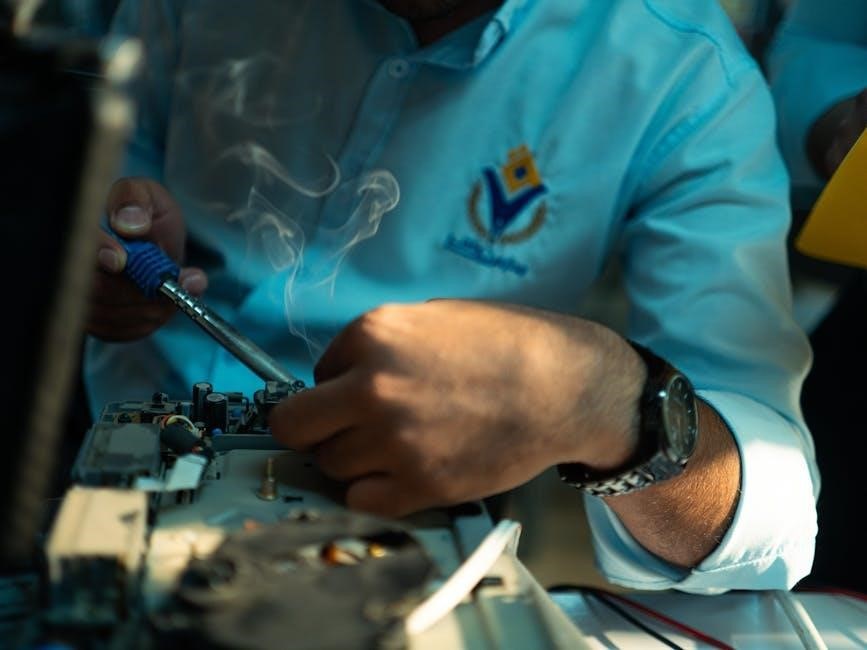
Begin by preparing all components, including the 1E7G tube, resistors, capacitors, and wiring․ Follow the schematic diagram to assemble the circuit on a breadboard or PCB․ Start with the power supply, ensuring proper voltage and grounding․ Next, install the tube and its associated components, carefully connecting the grid, plate, and cathode terminals; Wire the tuning circuit, including the variable capacitor and inductor, to ensure precise frequency adjustment․ Add the feedback loop and audio output stage, making sure all connections are secure․ Finally, test the circuit with a low voltage supply, gradually increasing power while monitoring performance․ Always refer to the circuit layout for accuracy․
4․2 Tools and Materials Required
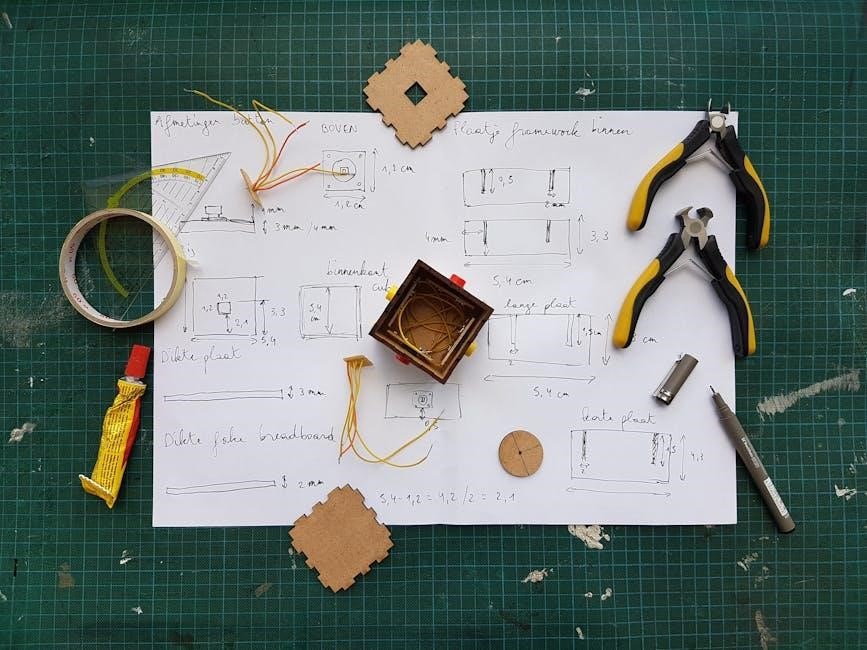
To construct the 1E7G regenerative radio circuit, you will need a soldering iron, wire strippers, and a multimeter for testing․ Essential materials include the 1E7G vacuum tube, resistors, capacitors, and a variable capacitor for tuning․ A coil or inductor, wiring, and a chassis or PCB are also necessary․ Additional components like a power supply, audio output transformer, and headphones are required for operation․ Optional tools include a signal generator and oscilloscope for advanced testing․ Ensure all materials match the specifications in the circuit diagram to avoid mismatches․ Proper tools and components are crucial for a successful and functional build․
4․3 Tips for Optimal Circuit Performance
For optimal performance of the 1E7G regenerative radio circuit, ensure proper grounding to minimize noise interference․ Use high-quality components, such as precision resistors and capacitors, to maintain signal integrity․ Solder all connections carefully to avoid cold joints or short circuits․ Adjust the feedback loop gradually to prevent oscillation and optimize sensitivity․ Regularly clean and inspect the tube and sockets to ensure proper contact․ Use a well-regulated power supply to maintain stable operation․ Fine-tune the variable capacitor for precise frequency alignment․ Properly shield the circuit to reduce external interference․ Following these tips will enhance the circuit’s stability, sensitivity, and overall performance, ensuring reliable operation․

Tuning and Alignment
Tuning and alignment involve adjusting the variable capacitor and feedback loop to achieve optimal sensitivity and stability․ Proper alignment ensures consistent performance across the desired frequency range․
5․1 Tuning the Regenerative Circuit
Tuning the regenerative circuit involves carefully adjusting the variable capacitor and regeneration control to achieve optimal performance․ Start by setting the regeneration feedback to a low level and gradually increase it while monitoring the signal strength․ Use a tuning knob to adjust the variable capacitor, ensuring the circuit resonates at the desired frequency․ Fine-tune the capacitor to maximize sensitivity without causing oscillation․ Proper tuning enhances selectivity and stability, allowing the circuit to pick up weak signals effectively․ Always use a signal generator or known frequency source for precise calibration․ Avoid over-tuning, as it can lead to instability or unwanted oscillations․ Patience and careful adjustment are key to achieving reliable performance․
5․2 Adjusting the Feedback Loop
Adjusting the feedback loop in the 1E7G regenerative radio circuit is critical for achieving optimal sensitivity and stability․ The feedback loop controls the amount of signal fed back to the input, enhancing selectivity․ To adjust it, start with minimal feedback and gradually increase it while monitoring the circuit’s response․ Use a variable resistor or potentiometer to fine-tune the feedback level․ Ensure the circuit remains stable by avoiding excessive feedback, which can cause oscillation․ Proper adjustment requires careful listening to the output signal, tweaking the feedback until the desired balance between sensitivity and stability is achieved․ This step is essential for maximizing the circuit’s performance․
5․3 Achieving Maximum Sensitivity
Achieving maximum sensitivity in the 1E7G regenerative radio circuit involves careful tuning and optimization of key components․ The variable capacitor and feedback loop play pivotal roles in enhancing sensitivity․ Start by adjusting the tuning capacitor to resonate at the desired frequency, ensuring minimal signal loss․ Next, fine-tune the feedback loop to amplify weak signals without causing oscillation․ Proper alignment of the circuit’s inductors and capacitors is also essential․ Using a high-quality antenna and minimizing external noise interference can significantly improve sensitivity․ Regularly check and clean connections to maintain optimal performance․ By systematically optimizing these elements, the 1E7G circuit can achieve its full potential in receiving weak signals with clarity and precision․

Applications of the 1E7G Regenerative Radio
The 1E7G regenerative radio excels in amateur radio operations, shortwave listening, and educational settings, offering a versatile tool for communication and learning․
6․1 Amateur Radio and Shortwave Listening
The 1E7G regenerative radio circuit is highly popular among amateur radio enthusiasts and shortwave listeners due to its simplicity and effectiveness․ Its compact design and low power consumption make it ideal for portable operations․ Hobbyists appreciate its ability to receive a wide range of frequencies, including amateur bands and international broadcasts․ The circuit’s sensitivity and selectivity, when properly tuned, allow for clear signal reception even in noisy environments․ It is often used in amateur radio contests, emergency communication drills, and as a teaching tool for understanding radio fundamentals․ This versatility makes it a favorite among both experienced operators and newcomers to the hobby․
6․2 Vintage Radio Restoration Projects
The 1E7G regenerative radio circuit is a popular choice for vintage radio restoration projects due to its historical relevance and simplicity․ Many enthusiasts seek to preserve the authenticity of classic radios, and the 1E7G’s design aligns well with these efforts․ Its compact size and reliable performance make it an ideal replacement or upgrade for aging components in vintage sets․ Restorers often appreciate the circuit’s ability to maintain the original character of the radio while improving its functionality․ Additionally, the process of integrating the 1E7G into vintage equipment provides a rewarding challenge for hobbyists, combining nostalgia with practical electronics skills․ This makes it a treasured component in many restoration endeavors․
6․3 Educational Use in Electronics Courses
The 1E7G regenerative radio circuit is widely used in educational settings to teach fundamental electronics concepts․ Its simplicity and hands-on nature make it an excellent tool for students learning about circuit design, signal amplification, and feedback mechanisms․ The circuit is often incorporated into courses to demonstrate principles such as resonance, impedance matching, and vacuum tube operation․ Many electronics programs use the 1E7G to train students in troubleshooting and circuit optimization techniques․ Its historical significance also provides a practical link to the evolution of radio technology․ By working with the 1E7G, students gain practical experience that prepares them for more complex projects in radio electronics and communication systems․

Modifications and Improvements
Modifications to the 1E7G regenerative radio circuit can enhance performance, including upgrading components, optimizing feedback loops, and integrating modern features while maintaining its classic functionality․
7․1 Adding an Audio Pre-Amplifier
Adding an audio pre-amplifier to the 1E7G regenerative radio circuit enhances sound quality by boosting weak signals before they reach the speaker․ This modification is particularly useful for improving the clarity of faint or distant broadcasts․ A transistor-based or op-amp pre-amplifier can be integrated between the detector stage and the audio output stage․ Ensure the pre-amplifier circuit is designed with a flat frequency response to maintain audio fidelity․ Proper grounding and shielding are essential to prevent noise interference․ This upgrade is ideal for users seeking better audio performance without altering the radio’s vintage character․ It significantly improves listening experiences, especially in environments with background noise․
7․2 Implementing Narrow Bandpass Filters
Implementing narrow bandpass filters in the 1E7G regenerative radio circuit improves selectivity by reducing interference from adjacent frequencies․ A bandpass filter, typically consisting of inductors and capacitors, is placed between the detector and audio stages․ This modification enhances the radio’s ability to isolate desired signals, especially in crowded frequency bands․ Narrow bandwidths minimize unwanted signals, ensuring clearer reception․ However, care must be taken to avoid overly restricting the passband, which could degrade sensitivity․ The filter’s design should align with the radio’s operating frequency range․ This upgrade is particularly beneficial for users operating in environments with significant RF interference or when targeting specific broadcast signals․
7․3 Upgrading Components for Better Performance
Upgrading components in the 1E7G regenerative radio circuit can significantly enhance its performance․ Replacing the original capacitors with high-quality, low-noise types reduces signal loss and improves clarity․ Using precision resistors ensures stable voltage and current levels, minimizing drift․ The vacuum tube itself can be upgraded to a higher-grade 1E7G or a compatible substitute for improved gain and stability․ Additionally, replacing the variable capacitor with a high-Q unit enhances tuning precision․ Shielding critical components, such as the oscillator coil, reduces external interference․ These upgrades collectively improve sensitivity, selectivity, and overall audio quality, making the radio more reliable and enjoyable to use for both amateur and professional applications․

Troubleshooting Common Issues
Common issues include oscillation, instability, or poor sensitivity․ Check circuit connections, verify component values, and ensure proper grounding․ Adjust feedback loop settings carefully to avoid overload․ Shielding components can reduce external interference․ Regularly clean and inspect tube pins and sockets to prevent poor contact․ Refer to the circuit diagram for troubleshooting steps to restore optimal performance quickly and effectively, ensuring reliable operation of the 1E7G regenerative radio circuit․
8․1 Identifying and Fixing Circuit Faults
Identifying faults in the 1E7G regenerative radio circuit requires a systematic approach․ Start by checking all connections for loose wires or solder joints․ Verify that all components are correctly installed and meet the specified values․ Use a multimeter to test for shorts or open circuits․ Inspect the vacuum tube for signs of wear or damage, and ensure it is properly seated in its socket․ If the circuit is not oscillating, check the feedback loop and tuning capacitor settings․ Clean or replace faulty components, such as resistors or capacitors, to restore proper circuit function․ Always refer to the circuit diagram for guidance․ Patience and attention to detail are key to resolving issues effectively․
8․2 Solving Oscillation and Stability Problems
Oscillation and stability issues in the 1E7G regenerative radio circuit can often be resolved by adjusting the feedback loop․ Ensure the regeneration control is set correctly to avoid over-regeneration, which can cause instability․ Check the tuning capacitor for proper alignment and grounding․ Loose or corroded connections may disrupt the circuit’s stability, so clean and secure all terminals․ If oscillations persist, slightly reduce the feedback by adjusting the feedback resistor or capacitor․ Verify that the power supply is stable and free from ripple, as fluctuations can affect circuit behavior․ Proper grounding and shielding of the circuit can also help minimize external interference and improve stability․ Always refer to the circuit diagram for guidance․
8․3 Diagnosing Audio Distortion Issues
Audio distortion in the 1E7G regenerative radio circuit can arise from several factors․ First, check the tube for proper bias settings, as incorrect bias can lead to nonlinear amplification․ Inspect the output transformer for proper impedance matching and ensure it is not saturated․ Faulty or degraded coupling capacitors may also introduce distortion․ Verify the regeneration control is not set too high, as over-regeneration can distort the audio signal․ Grounding issues or loose connections can cause hum or interference, which may manifest as distortion․ Finally, ensure the power supply is stable and free from ripple, as fluctuations can affect the tube’s operation․ Cleaning or replacing faulty components often resolves distortion problems․ Always refer to the circuit diagram for troubleshooting guidance․

Resources and References
Download the 1E7G regenerative radio circuit PDF for detailed schematics and instructions․ Explore recommended guides, technical manuals, and join online forums for builder support and discussions․
9․1 Downloading the 1E7G Regenerative Radio Circuit PDF
The 1E7G regenerative radio circuit PDF is a comprehensive guide for builders, offering detailed schematics, component lists, and step-by-step assembly instructions․ It provides in-depth technical specifications, tuning procedures, and troubleshooting tips․ The PDF also includes theoretical explanations of the circuit’s operation, making it invaluable for both beginners and experienced enthusiasts․ To download the 1E7G regenerative radio circuit PDF, visit reputable electronics forums, vintage radio websites, or official manufacturer archives․ Ensure the source is reliable to avoid incorrect or incomplete information․ This resource is essential for anyone aiming to construct or modify a 1E7G regenerative radio successfully․
9․2 Recommended Reading and Guides
For a deeper understanding of the 1E7G regenerative radio circuit, several books and online guides are highly recommended․ Classic texts like Understanding Radio Circuits and Regenerative Receivers: A Guide to Building and Using Them provide foundational knowledge․ Online forums and communities, such as the ARRL (American Radio Relay League) and vintage radio enthusiasts’ groups, often share detailed construction notes and troubleshooting tips; Additionally, technical bulletins from vintage electronics clubs offer insights into optimizing the 1E7G circuit․ These resources complement the circuit PDF, ensuring builders have a well-rounded understanding of both theory and practical implementation․
9․3 Online Communities for Support
Engaging with online communities is invaluable for support and guidance when working with the 1E7G regenerative radio circuit․ Forums like Reddit’s r/AmateurRadio and r/VintageRadios are excellent platforms for discussing circuit designs and troubleshooting․ Specialty ham radio forums and vintage electronics groups also offer extensive knowledge and resources․ Facebook groups dedicated to radio restoration often share practical tips and insights․ These communities provide a space to ask questions, share experiences, and learn from experts․ Many members generously offer schematics, modification ideas, and hands-on advice, making them indispensable for builders and enthusiasts alike․
The 1E7G regenerative radio circuit offers a unique blend of simplicity and performance, making it a fascinating project for hobbyists and electronics enthusiasts․ Its applications in amateur radio and educational settings highlight its versatility and enduring relevance․ Builders are encouraged to explore modifications and share their experiences, contributing to the community’s collective knowledge and innovation․
10․1 Summary of the 1E7G Regenerative Radio Circuit
The 1E7G regenerative radio circuit is a classic design utilizing the 1E7G vacuum tube for signal detection and amplification․ It employs regenerative detection, offering impressive sensitivity and selectivity for its simplicity․ The circuit’s feedback loop is crucial for tuning, allowing users to adjust the regeneration level for optimal performance․ Its compact design and minimal component count make it accessible for hobbyists and educational projects․ Historically significant, this circuit demonstrates fundamental radio principles, making it a valuable tool for learning electronics and radio theory․ The 1E7G regenerative radio circuit remains a popular choice for amateur radio enthusiasts and vintage electronics restoration․
10․2 Final Tips for Builders and Enthusiasts
When building the 1E7G regenerative radio circuit, prioritize precision in component selection and wiring to ensure optimal performance․ Use high-quality capacitors and resistors to minimize signal loss․ Proper grounding is essential to reduce noise and hum․ Experiment with regeneration levels carefully to avoid oscillation․ Start with lower voltage supplies during initial testing to safeguard components․ Consider adding a variator for smoother tuning adjustments․ For better audio clarity, ensure the feedback loop is properly adjusted․ Refer to the 1E7G Regenerative Radio Circuit PDF for detailed schematics and guidelines․ Join online forums for troubleshooting and sharing experiences with fellow enthusiasts․